Add Class
TABLE OF CONTENTS
In the platform, a class comprises students and teachers. Publishers and school/district admins can create classes in the school. Individual teachers can also create classes and roster students in the class.
Add Class
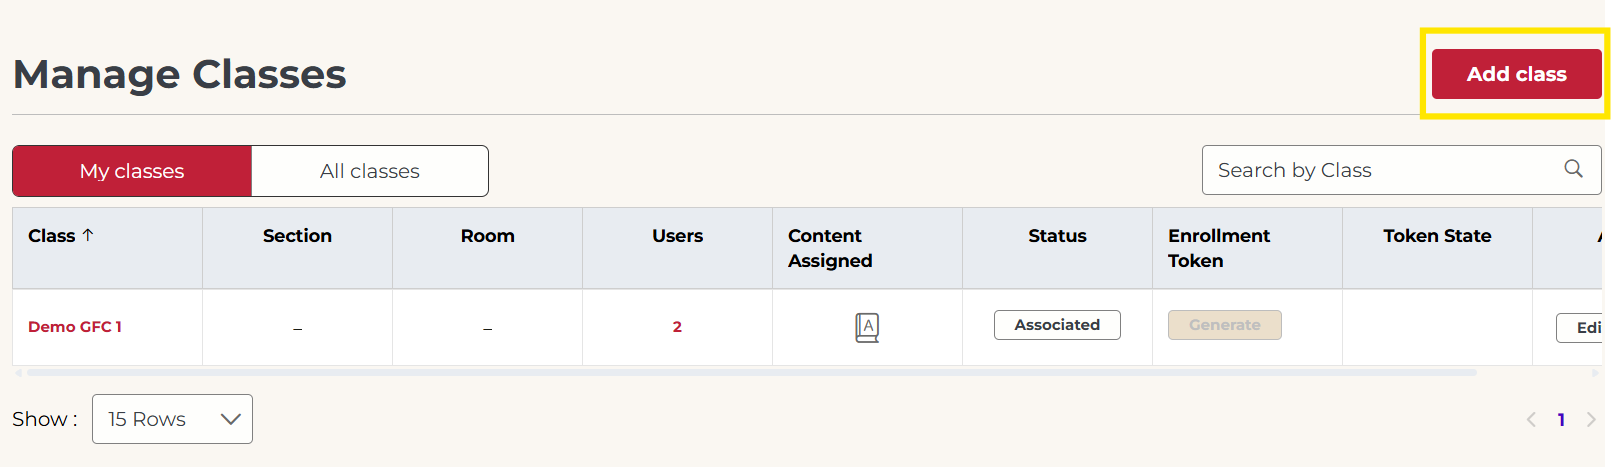
1. Log in to the portal.
2. Click Roster on the left-hand side menu.
3. Click Manage Classes / Class in the sub-menu.
4. Click on Add class.
Not what you see? Click to see the old UI view.

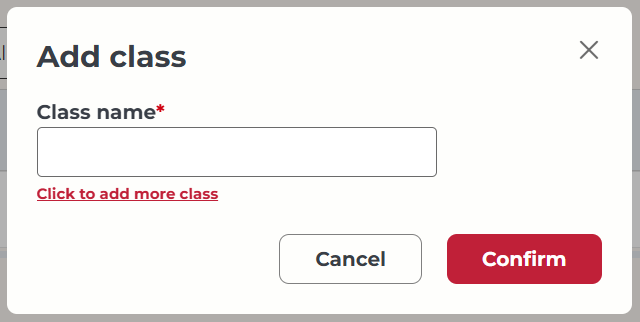
5. Enter a Class name in the space provided. To add multiple classes at once, click Click to add more class.
Not what you see? Click to see the old UI view.
Enter a "Class name" in the space provided. Add multiple classes at once by clicking on "Add More".
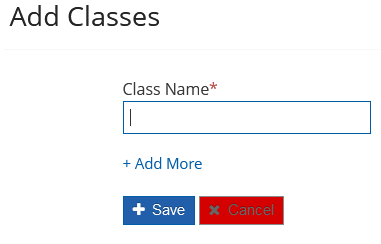
6. Click Confirm / Save.
Helpful hints:
Follow the below instructions for entering Class Name data successfully.
'Class Name' can contain letters, numbers, spaces, apostrophes, and some special characters. The following special characters are not allowed: " ˜ ' , ? < >
'Class Name' is mandatory.
'Class Name' should be unique.
'Class Name' cannot be greater than 50 characters.
If you want to roster multiple classes together, you can opt for the bulk upload class feature.
Once the class is created, you can add and associate students and teachers with the class. (Note: It is mandatory for a school/district/individual teachers to have a sufficient number of licenses to roster students and teachers.)
Bulk Upload Class
The platform allows you to add multiple classes (up to 500 classes) simultaneously using the Bulk upload class feature. Publishers, school/district admins, individual teachers can bulk upload classes.
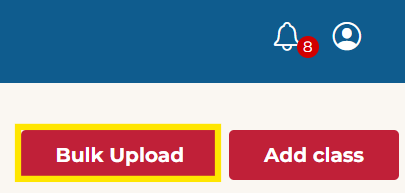
1. Log in to the portal.
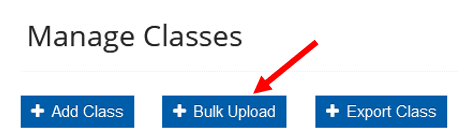
2. Click Roster on the left-hand side menu.
3. Click Manage Classes or Class in the sub-menu.
4. Click on Bulk Upload.
Not what you see? Click to see the old UI view.
5. Next to Download template, click the CSV or XLS icon to download a csv/xls bulk upload template. 
Not what you see? Click to see the old UI view.
Click the "Download CSV template" or "Download xls" button to download a csv/xls bulk upload template.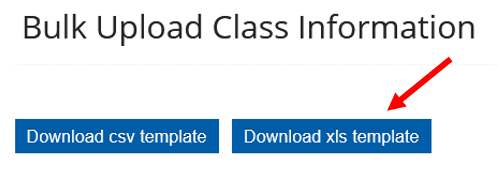
6. Follow the instructions below to enter valid data into the csv/xls template.
(Note: See the below screenshot for the data required for Bulk Upload. Please do not change the structure or delete fields in the template. Leave the column blank if you are not using the required detail.)

Bulk Upload class template
Helpful hints for entering valid data into the csv/xls template:
'Class Name' can contain letters, numbers, spaces, apostrophes and some special characters. The following special characters are not allowed: " ˜ ' , ? < >
'Class Name' is mandatory.
'Class Name' should be unique.
'Class Name' cannot be greater than 50 characters.
Do not delete the first-row listing field name from the template.
Upload up to 500 classes.
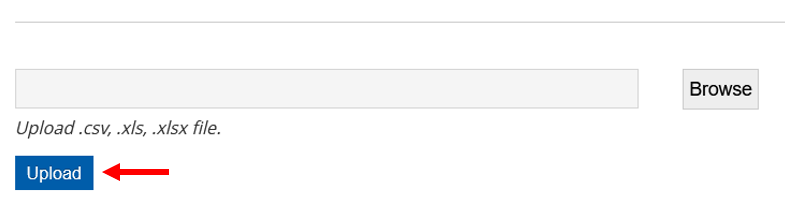
7. Drag and drop the template file to upload it, or click Select file from computer.

Not what you see? Click to see the old UI view.
Click on "Browse" to Import the file on the portal from your system.

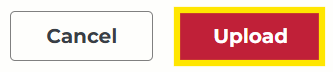
8. Click Upload.
Not what you see? Click to see the old UI view.
Edit Class
Publishers, school/district admins, and individual teachers can update the class name using the "Edit Class" feature.
1. Log in to the portal.
2. Click Roster on the left-hand side menu.
3. Click Manage Classes / Class in the sub-menu.
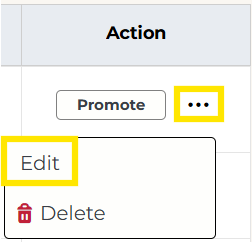
4. Click on the Edit button on the class list. You may need to use the horizontal bar to scroll to the right.
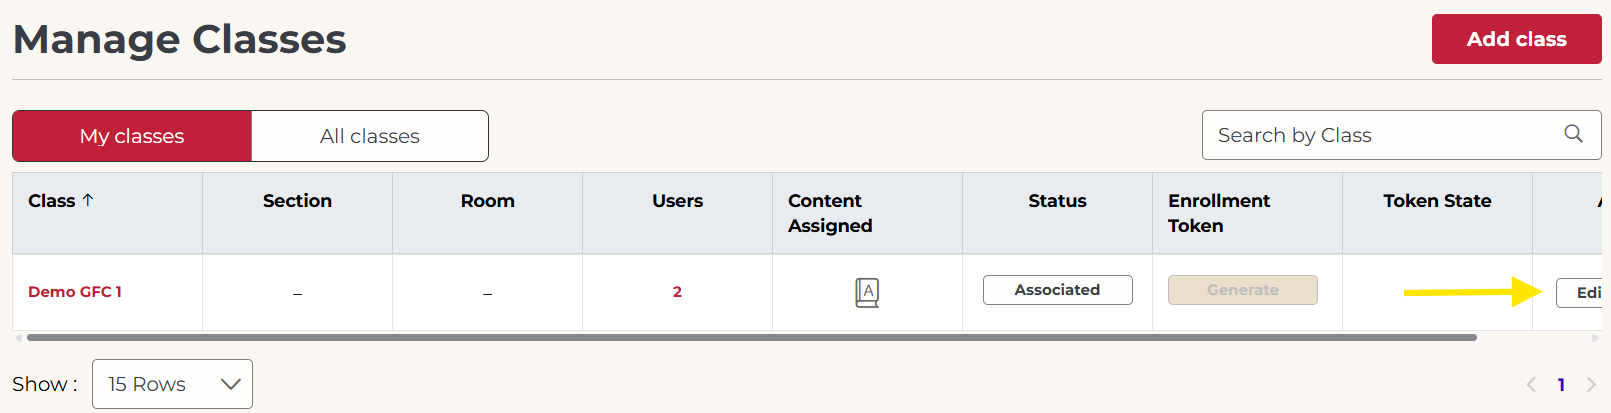
If you do not see an Edit button, click the 3 dots under the Action column.
Not what you see? Click to see the old UI view.
Click on the Edit icon (pencil) on the class list.

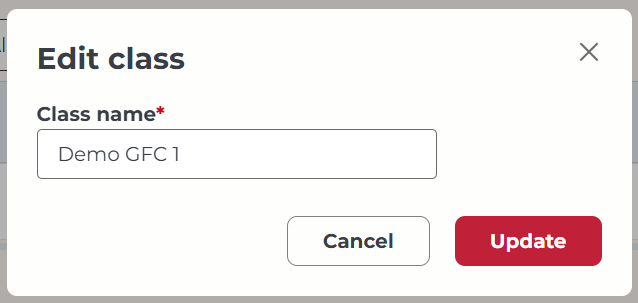
5. Edit the "Class name" in the box, then click Update.
Not what you see? Click to see the old UI view.
Edit the "Class Name" in the box, then click Save.

6. You will see a confirmation message when the class is edited successfully.

Helpful hints:
Follow the below instructions for entering class name data successfully.
'Class Name' can contain letters, numbers, spaces, apostrophes, and some special characters. The following special characters are not allowed: " ˜ ' , ? < >
'Class Name' is mandatory.
'Class Name' should be unique.
'Class Name' cannot be greater than 50 characters.
Delete Class
A class comprises students and teachers, on the platform. Therefore, student and teacher association must be removed first in order to delete the class successfully. Publishers, school/district admins, and individual teachers can delete a class.
Note: Perform the below steps if you want to delete the class in which the students and teachers are associated.
1. Log in to the portal.
2. Click Roster on the left-hand side menu.
3. Click Manage Classes / Class in the sub-menu.
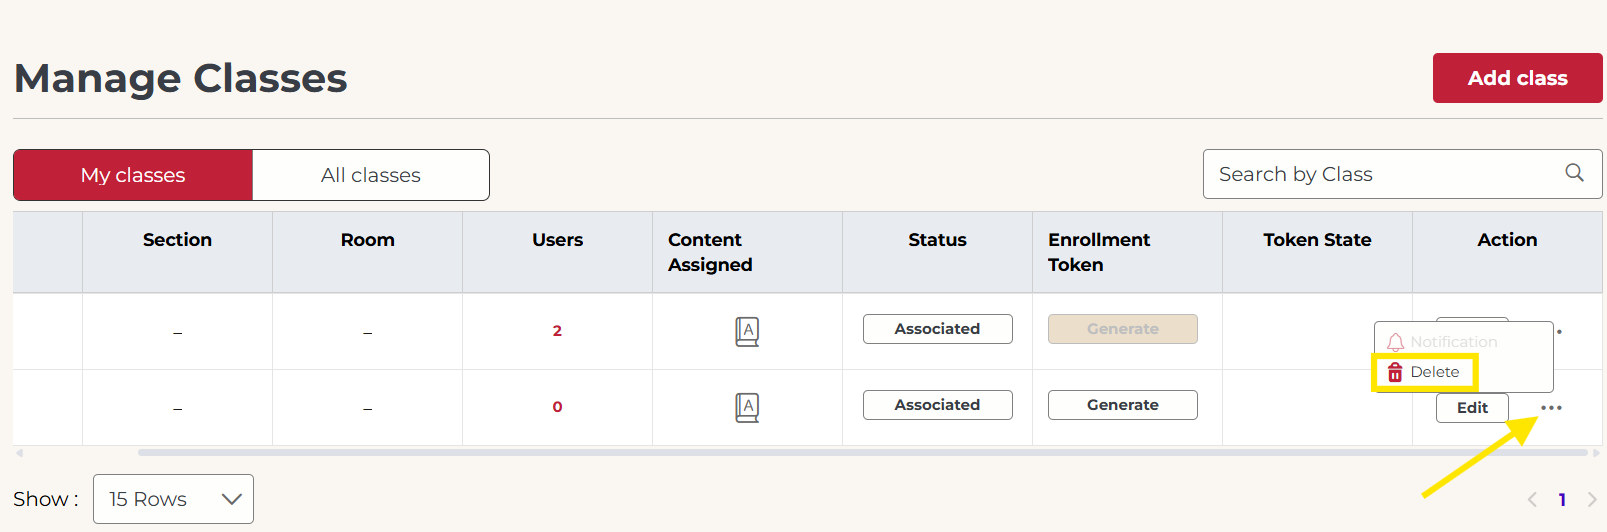
4. Scroll to the right to see the Action column. Click on the 3 dots, then click Delete.
Not what you see? Click to see the old UI view.
Click on the delete icon on the class list.

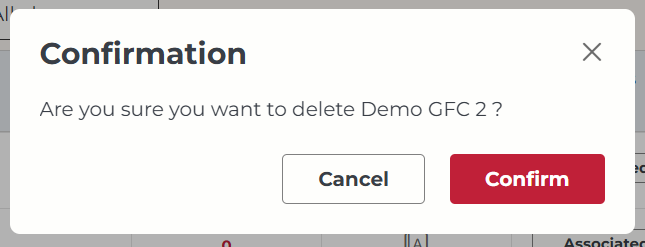
5. Click Confirm / Yes to delete the class.
Not what you see? Click to see the old UI view.
Click "Yes" to delete the class.

Was this article helpful?
That’s Great!
Thank you for your feedback
Sorry! We couldn't be helpful
Thank you for your feedback
Feedback sent
We appreciate your effort and will try to fix the article