Assigning Content to Students
TABLE OF CONTENTS
Video Tutorial: How to Assign Content
(Note: Video is optional. Below article contains additional, specific information on assigning content.)
Not what you see? Click to see the old UI view.
Assign Content to Student
Teachers can assign content to students. If new students have joined the class after the teacher has assigned the content (to the entire class), the previously assigned content will be automatically assigned to new students. The teacher can also revoke content access by unassigning content to the student.
Not what you see? Click to see the old UI view.

Follow the below steps to assign content to students:
1. Log in to the portal.
2. Select Learning Content on the left-hand side menu.
3. Select Assign Content in the sub-menu. You will be redirected to the Assign Content page.
Not what you see? Click to see the old UI view.

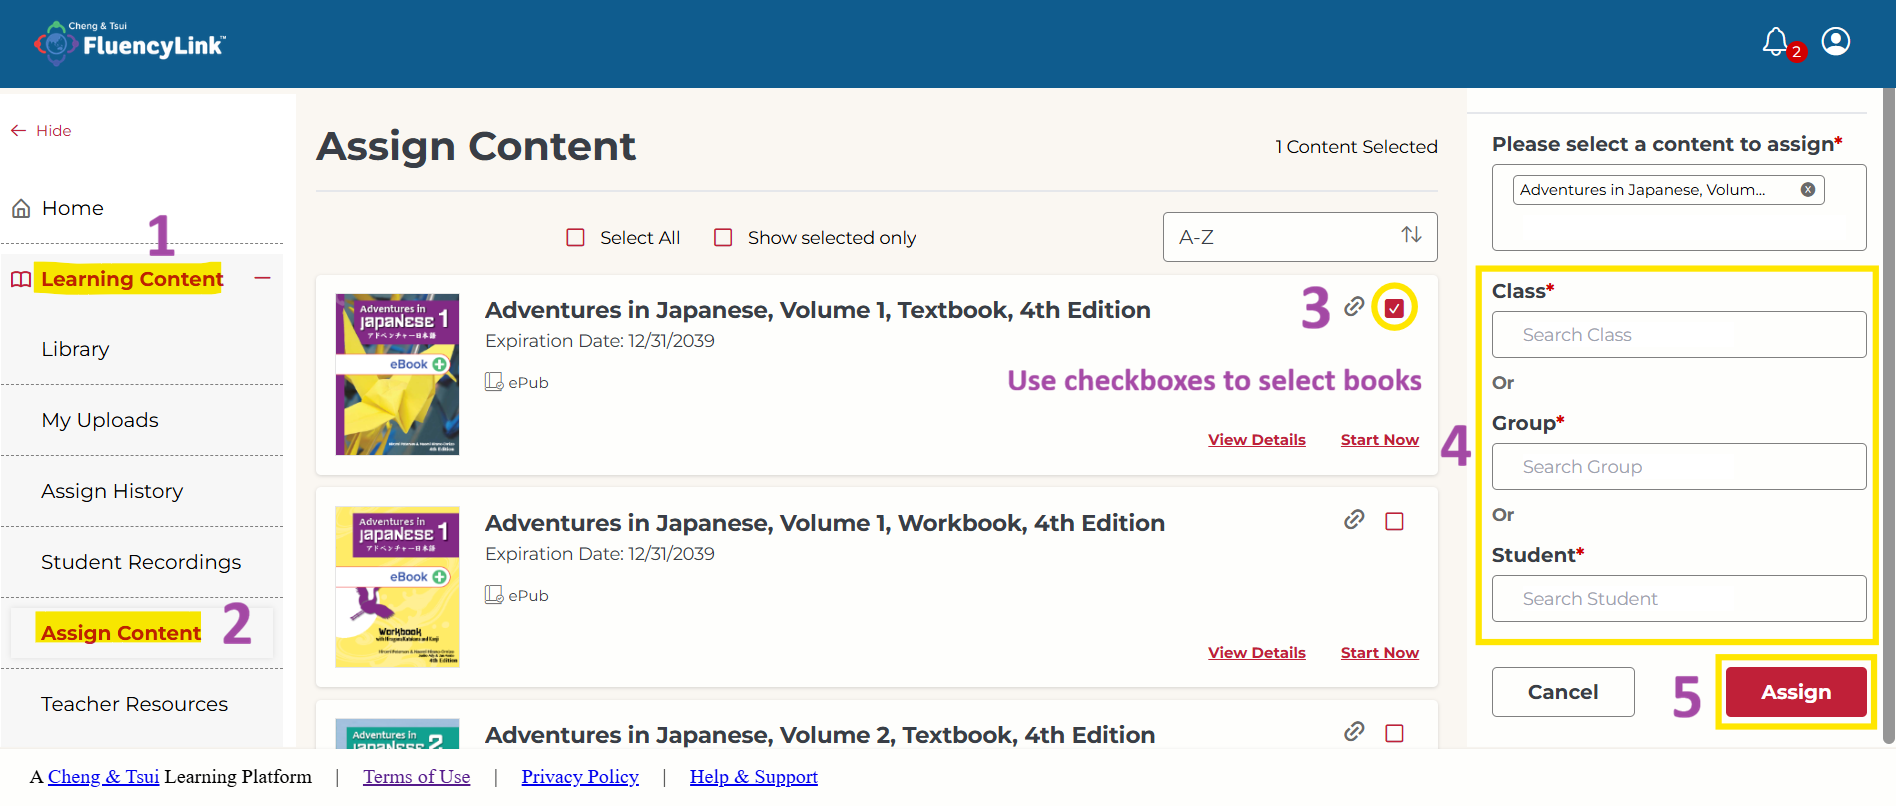
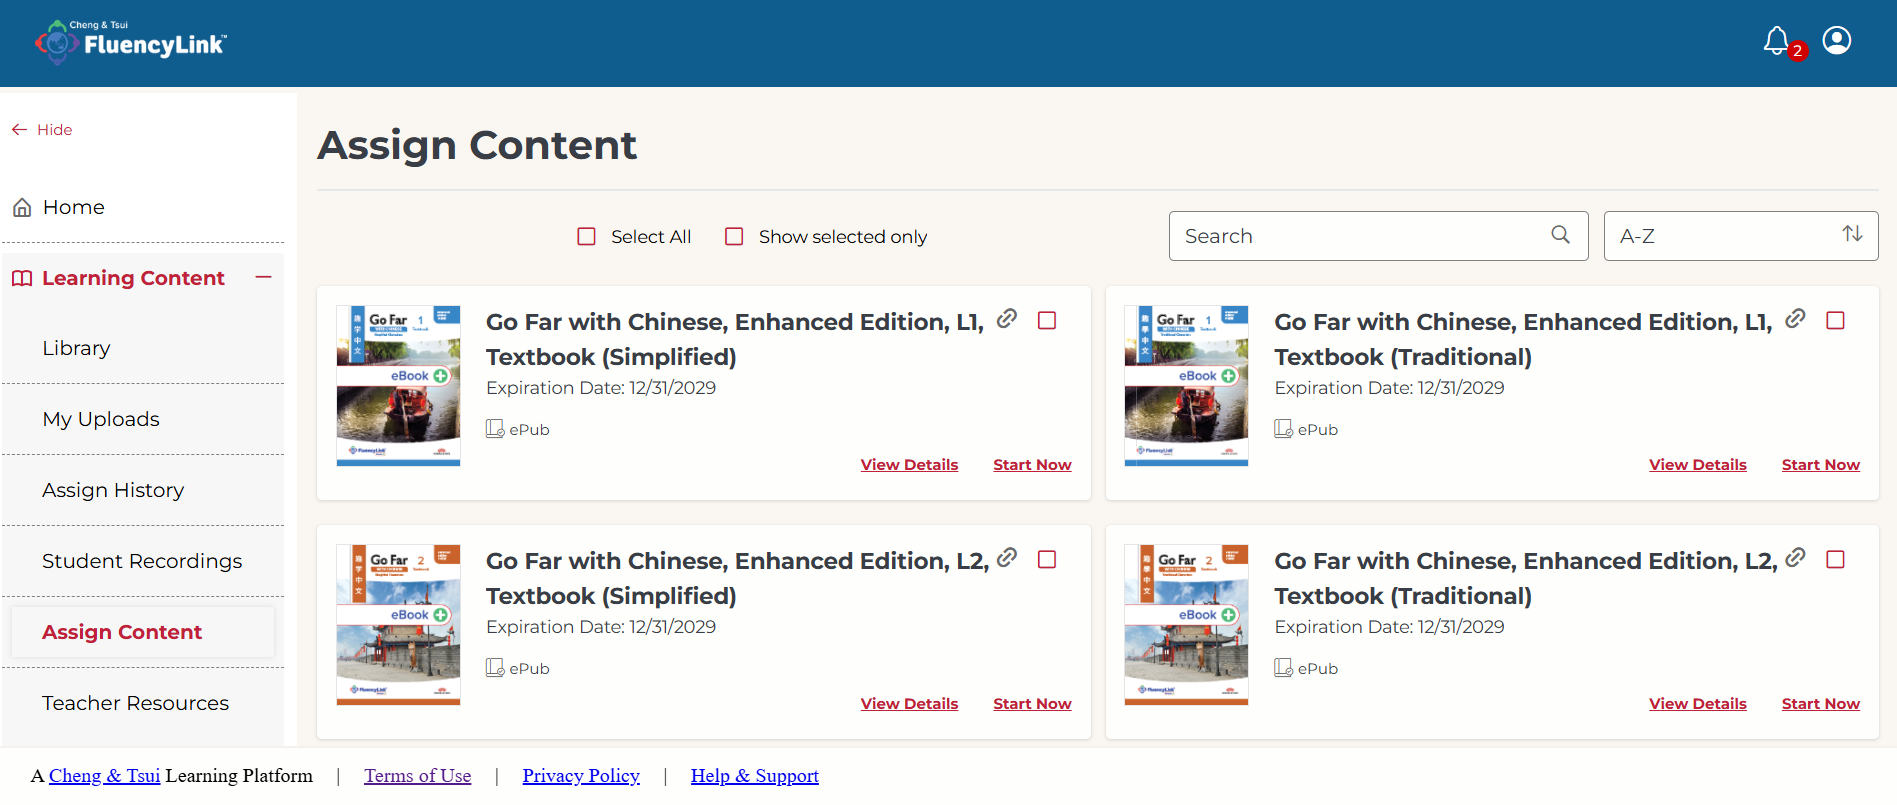
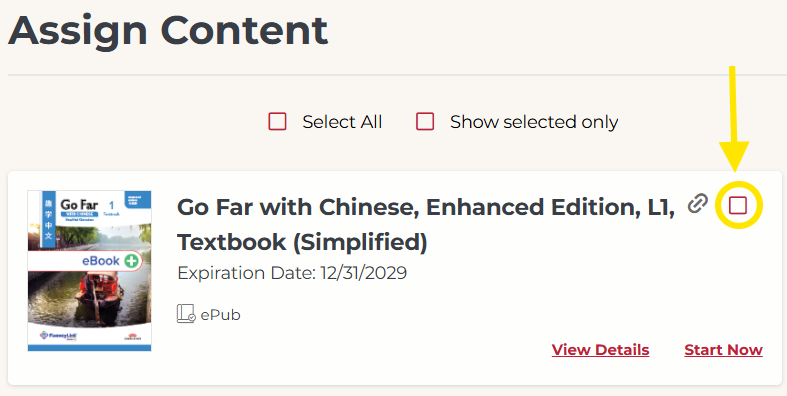
4. You can assign the content to students that are listed on the Assigned Content page. Click on the corresponding checkboxes or click Select All to assign all the content.
The content will populate in the "Assign" box.
Not what you see? Click to see the old UI view.

You can assign the content to students that are listed on the Assigned Content page. Click on the content thumbnail you wish to assign or click "Select All" to assign all the content.
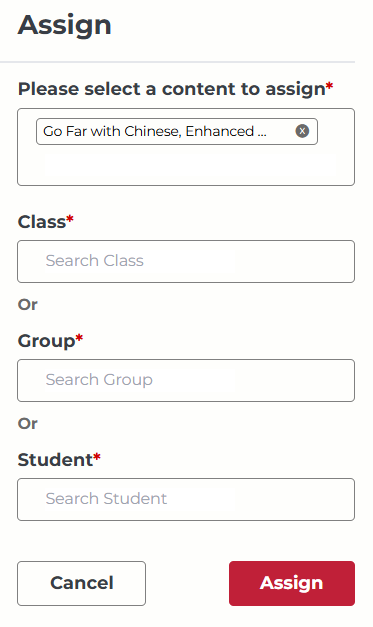
5. Do any of the following to assign content:
a. Assign content to classes:
Click inside the Class box.
Select a class from the list. You can select more than one class to assign content to.
b. Assign content to groups:
Click inside the Group box.
Select a group from the list. You can select more than one group to assign the content to.
c. Assign content to students:
Click inside the Student box.
Select a student from the list. You can select more than one student to assign the content to.
6. Click the Assign button.
Note: If the user gets the same content via multiple licenses, then the visibility of the content in the library will be driven by the maximum license validity date.
Unassign Content
This feature allows the teacher or individual teacher to revoke content access from students/classes/groups by unassigning the content. The students/classes/groups will not be able to access the content, once it is unassigned.
Follow the below steps to unassign content:
1. Log in to the portal.
2. Select Learning Content on the left-hand side menu.
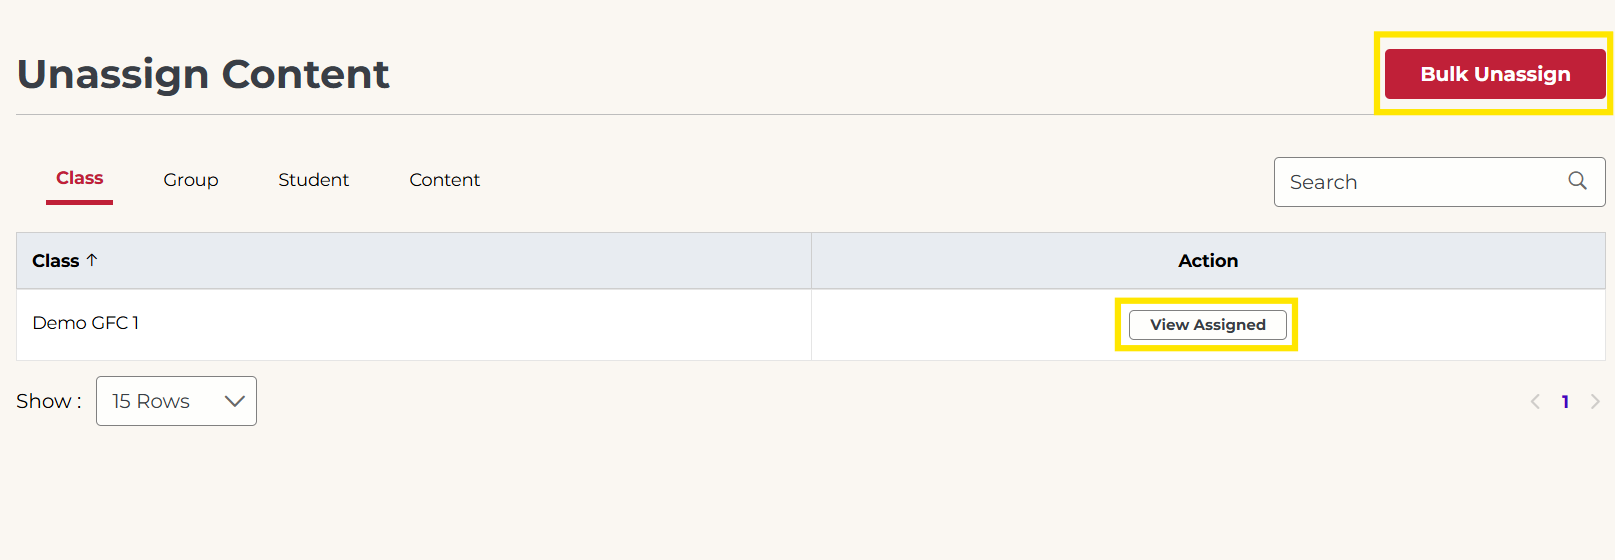
3. Select Assign History in the sub-menu. You will be redirected to the "Unassign Content" page.
Here, you can unassign content in two ways:
Bulk Unassign
View Assigned
Not what you see? Click to see the old UI view.

4. If you click on Bulk Unassign, you will be redirected to the "Bulk Unassign" page.
You can revoke all content or individual content access from one or multiple students/classes/groups by unassigning the content. The students/classes/groups will not be able to access the content, once it is unassigned.
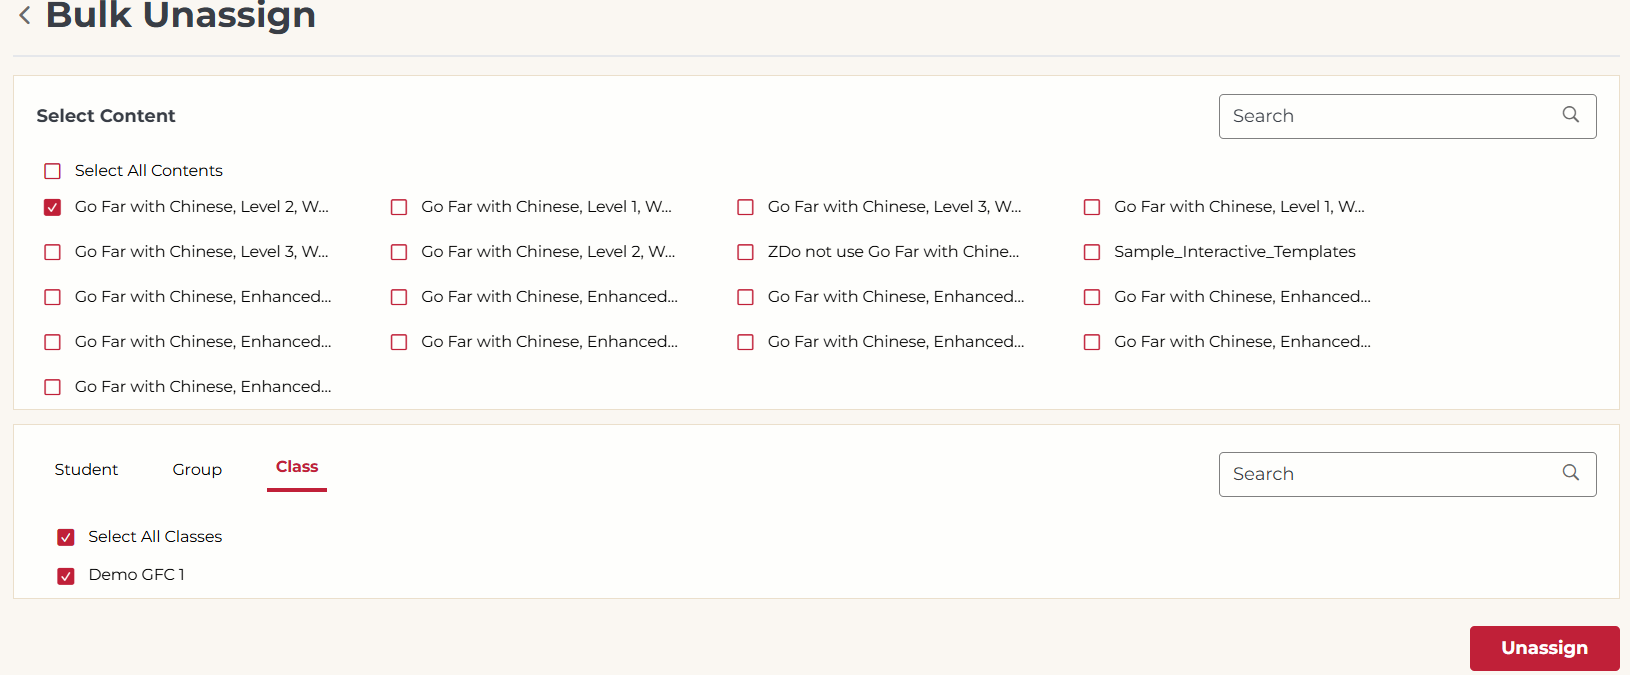
Choose Select All Contents or click the checkboxes for the content you wish to unassign.
Select the students/groups/classes from whom you wish to revoke content access.
Click Unassign.
Not what you see? Click to see the old UI view.

Select “Individual Content” or “All Content” by clicking the radio button for the content you wish to unassign.
Select the students/groups/classes from whom you wish to revoke content access.
Click "Unassign."
OR
4. Choose the appropriate tab to unassign content individually by class, group, student, or content.
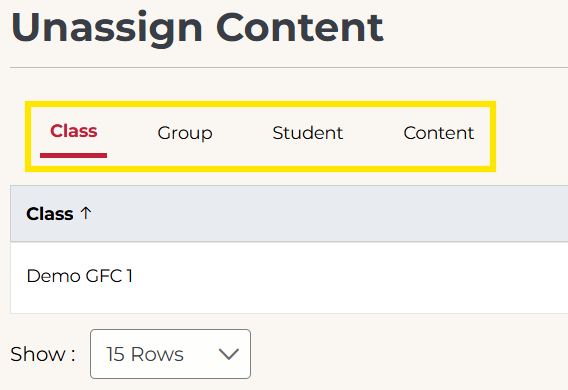
- Class: unassign content from a specific class
- Group: unassign content from a specific group
- Student: unassign content from a specific student
- Content: unassign a specific piece of content from any classes/groups/students
Not what you see? Click to see the old UI view.
With the old UI, you only have the option to unassign a specific piece of content from from classes/groups/students.5. Click on the View Assigned button in the appropriate row.
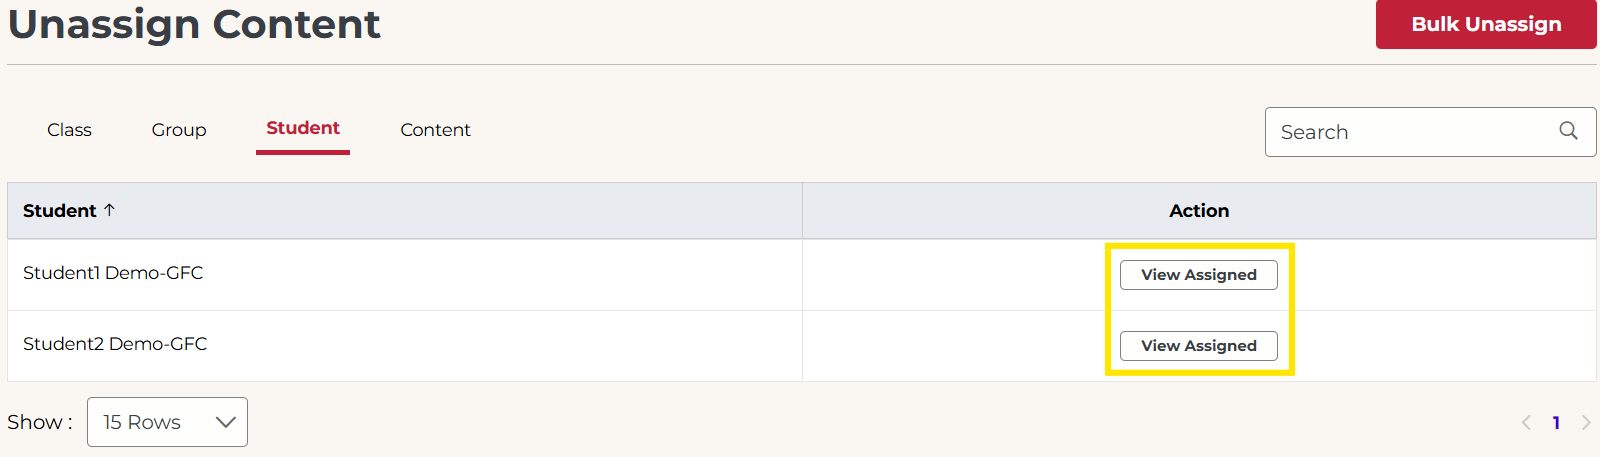
- Class/Group/Student: you will see a row for each class/group/student
- Content: you will see a row for each content item (book)
Not what you see? Click to see the old UI view.
Click on the edit icon on the "Content Assign History" page to unassign one content piece at a time. If you click on the Edit icon, you will be redirected to the "Edit Assignee" page.6. You will see a pop-up window to make your unassign selection. Use the checkboxes to make your selection, then click Unassign.
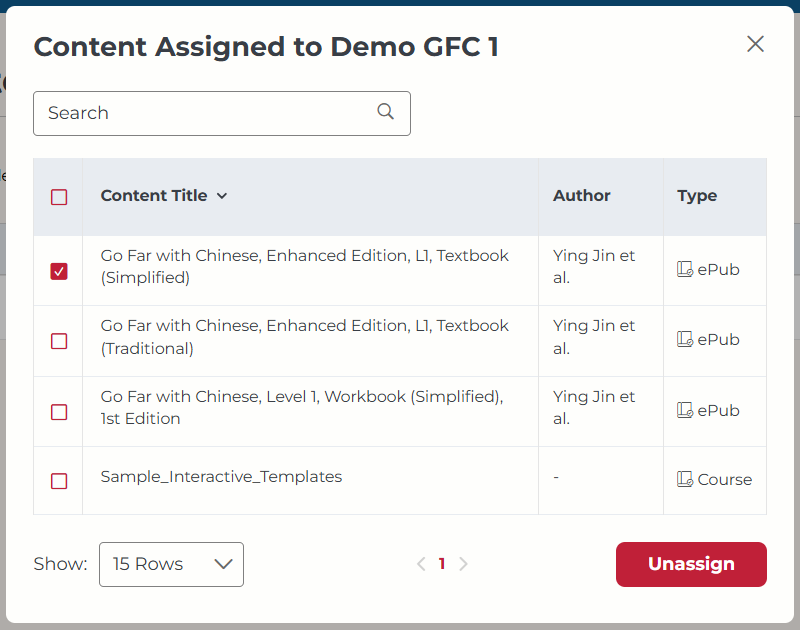
- Class/Group/Student: use the checkboxes to select all the content you want to unassign
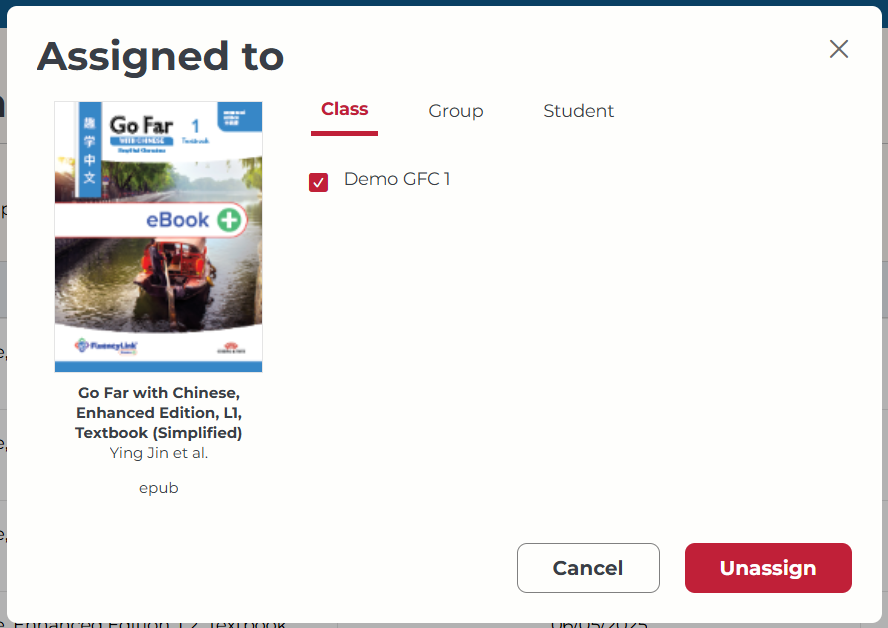
- Content: use the tabs to view all classes/groups/students, and use the checkboxes to select the ones you want to unassign the content from
Not what you see? Click to see the old UI view.
On the "Edit Assignee" page:
Check the students/classes/groups checkbox to unassign the content.
Click Unassign.

Was this article helpful?
That’s Great!
Thank you for your feedback
Sorry! We couldn't be helpful
Thank you for your feedback
Feedback sent
We appreciate your effort and will try to fix the article