Class Set Up and Enrollment Tokens
TABLE OF CONTENTS
- To add your class(es)
- To verify that your students have joined your class(es)
- Unrostering a student who has dropped your class
This article is only for individual teachers who registered with an access code. If you are a teacher associated with a school/district and you do not use access codes, please see Add Class and Add Student.
To add your class(es)
1. Go to Roster > Manage Classes. 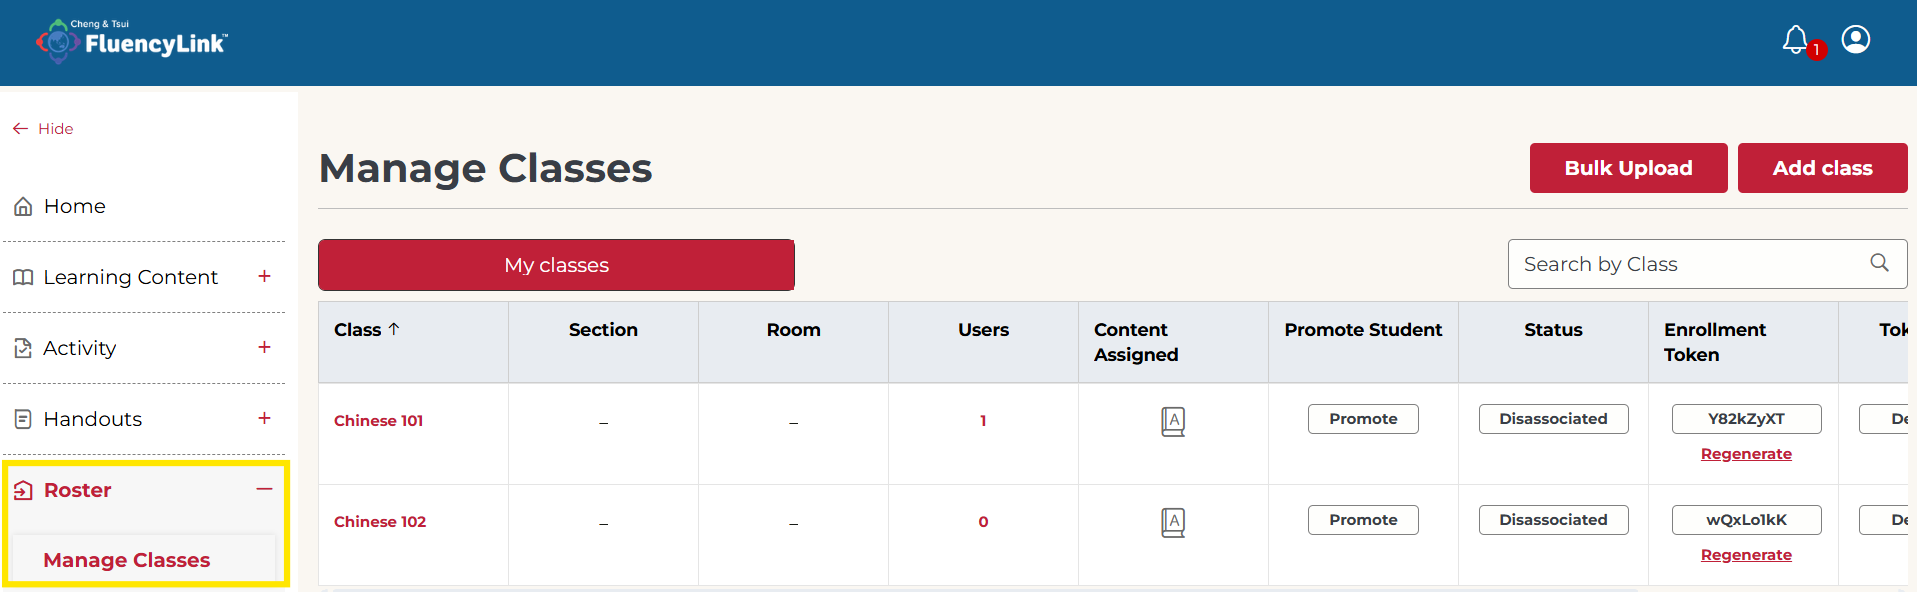
Not what you see? Click to see the old UI view.
Go to Roster > Class.

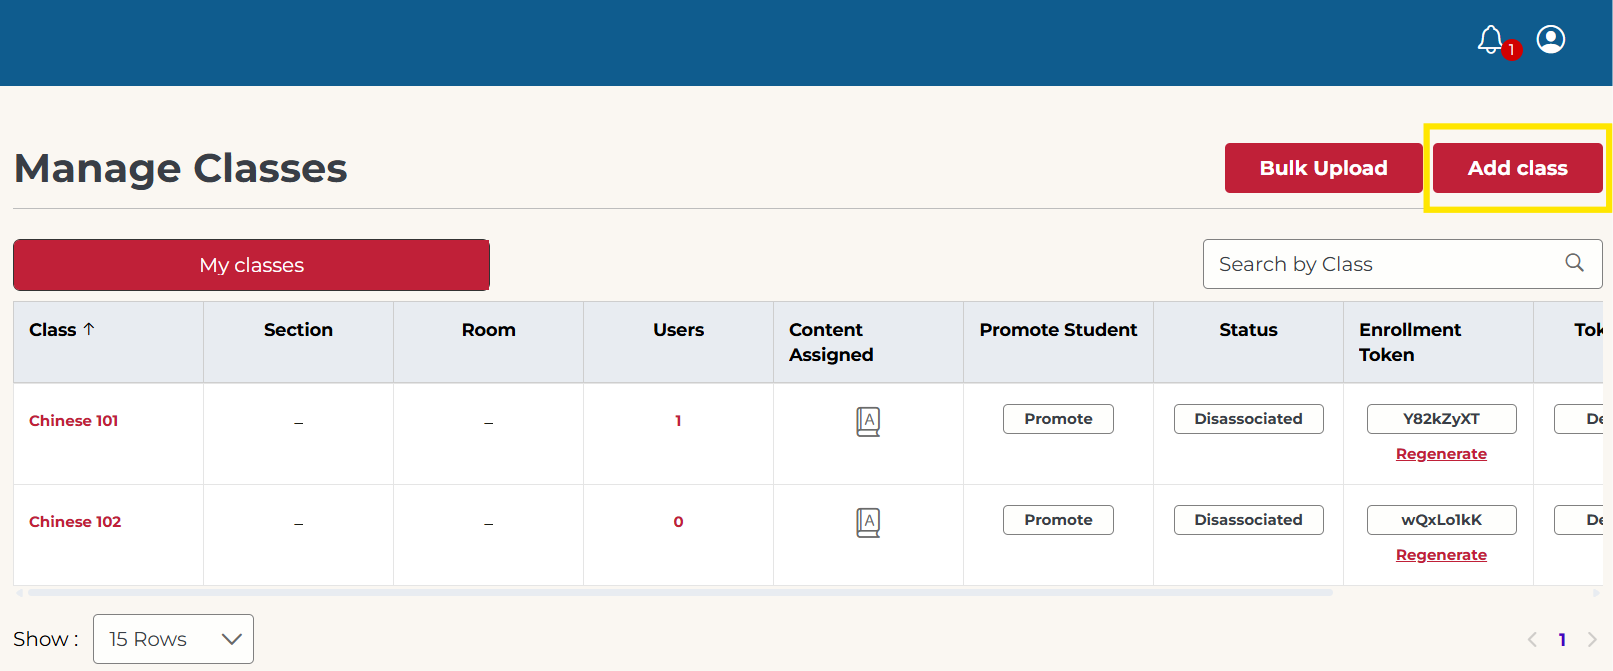
2. On the Manage Classes screen, click the Add class button.
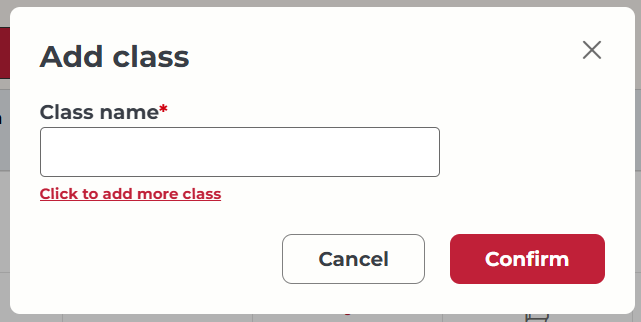
3. Fill out the Class name field (if you have more than one class, use Click to add more class) and click the Confirm button.
Not what you see? Click to see the old UI view.
Fill out the Class Name field (if you have more than one class click the + symbol to add another field) and click the Save button.

(Note: If you have many classes to add, instead of adding class by class, you can use the Bulk Upload option and follow the instructions in the Bulk Upload Class Information screen)
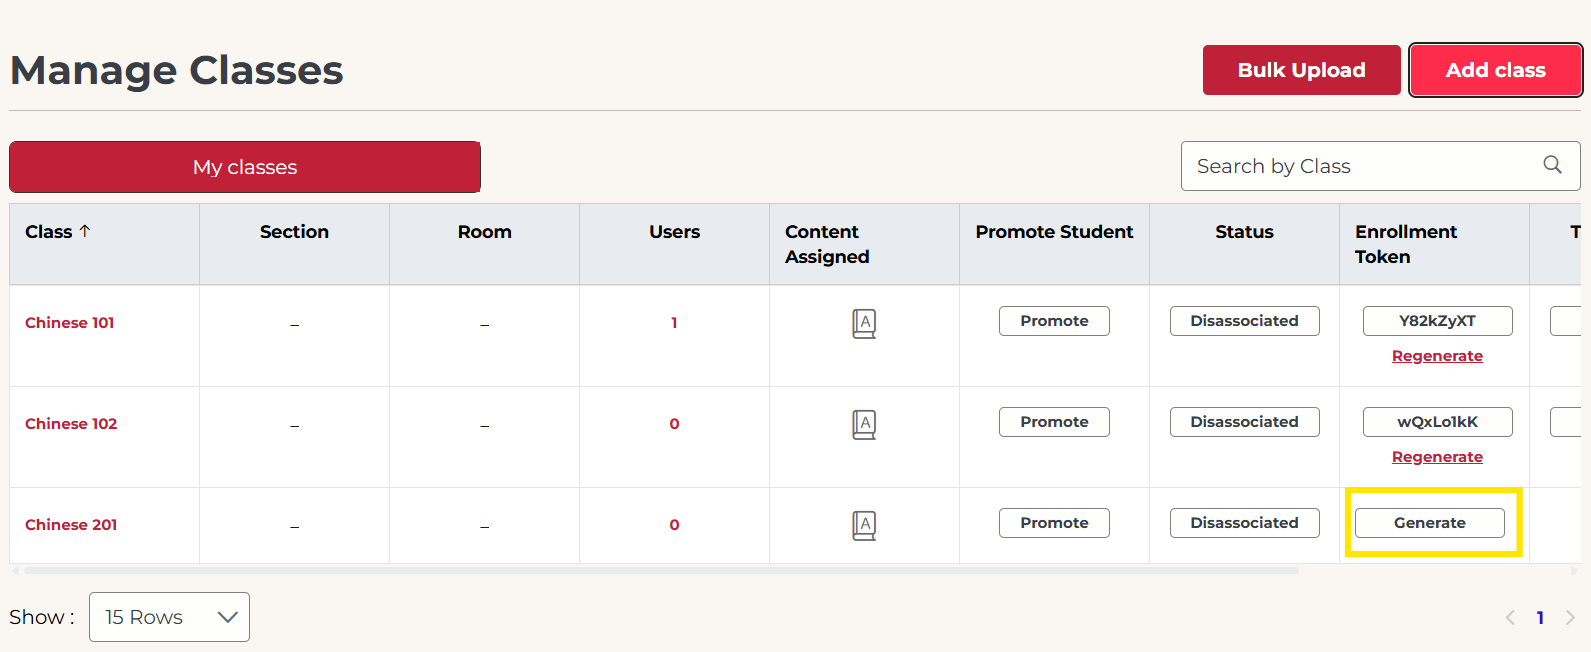
4. For each class you’ve created, click the Generate button in the Enrollment Token column.
Not what you see? Click to see the old UI view.
In Manage Classes, for each class you’ve created, click the Generate button in the Class Enrollment Token column.

5. You will see that the token has been generated.
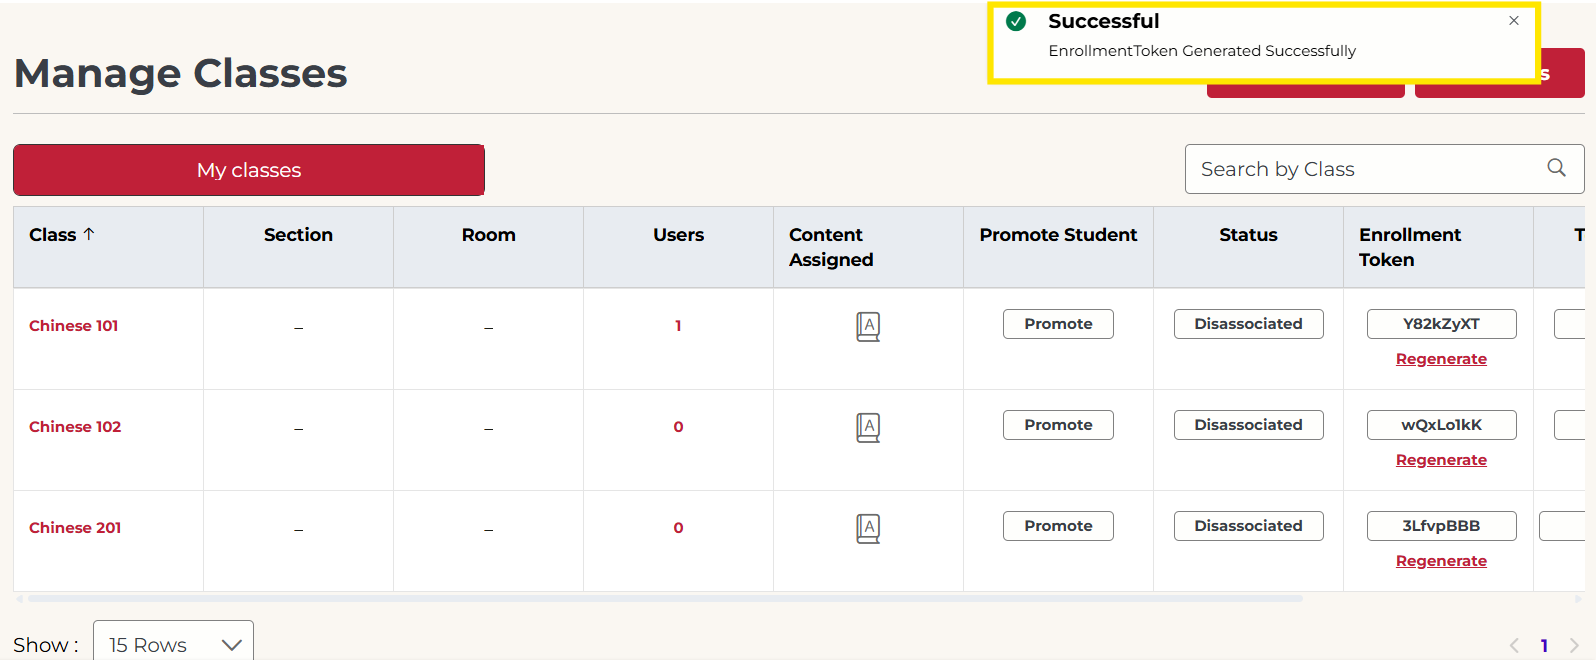
Not what you see? Click to see the old UI view.

6. Distribute the token to your students. They will use it to join your class after they create an account.
This is all you need to do for students to join your class(es), once they have activated their own access codes. Since they already have their books, you do not need to assign the book content to your students.
To verify that your students have joined your class(es)
1. Go to Roster > Manage Students. As students join, you should see them listed as part of the class.
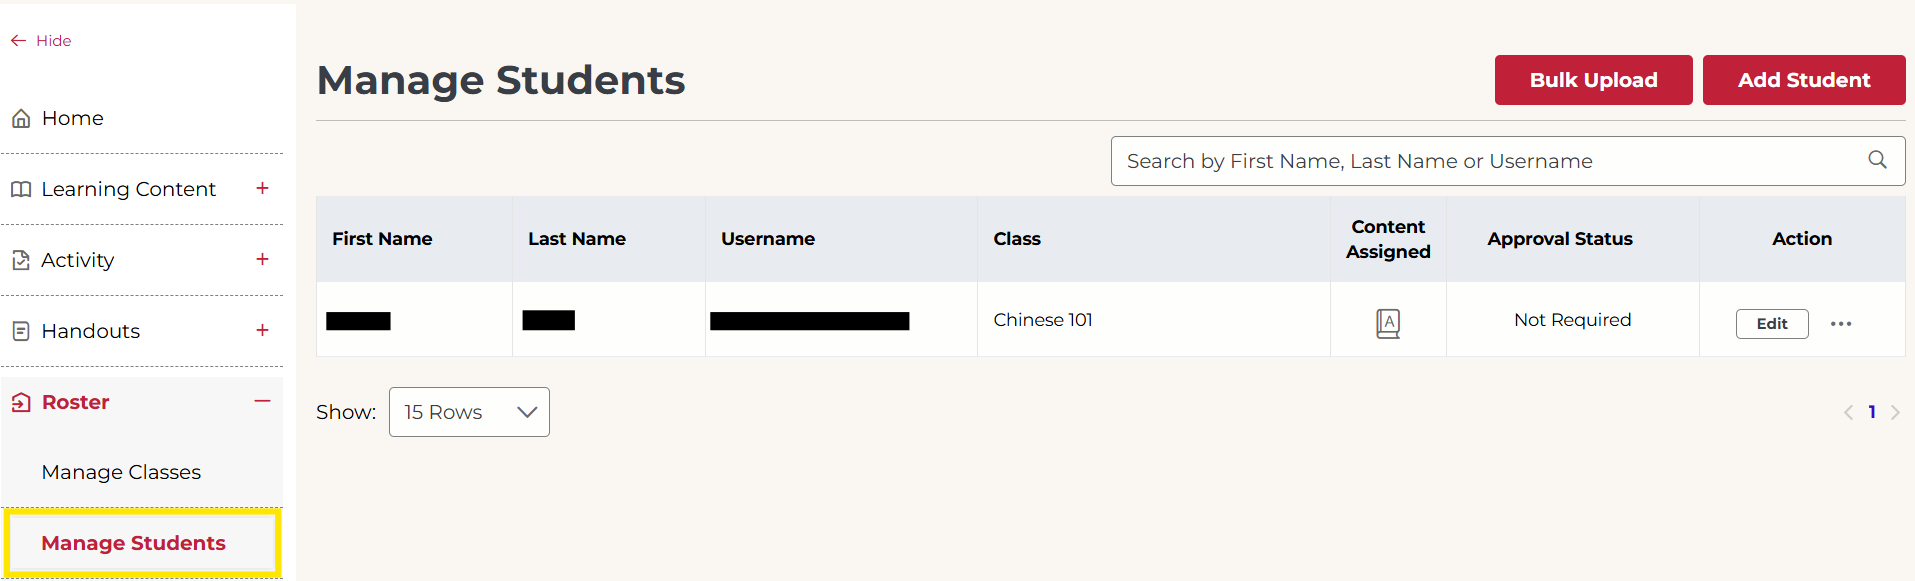
Not what you see? Click to see the old UI view.
Go to Roster > Student. As students join, you should see them listed as part of the class.

Unrostering a student who has dropped your class
If a student drops your class, you will need to manually remove them from the roster in order for them to join another instructor’s class.
(Note: Follow the same steps if a student moves from one of your classes to another, because each class has a separate enrollment token.)
1. Go to Roster -> Manage Students and find the student in the table. Click the Edit button.
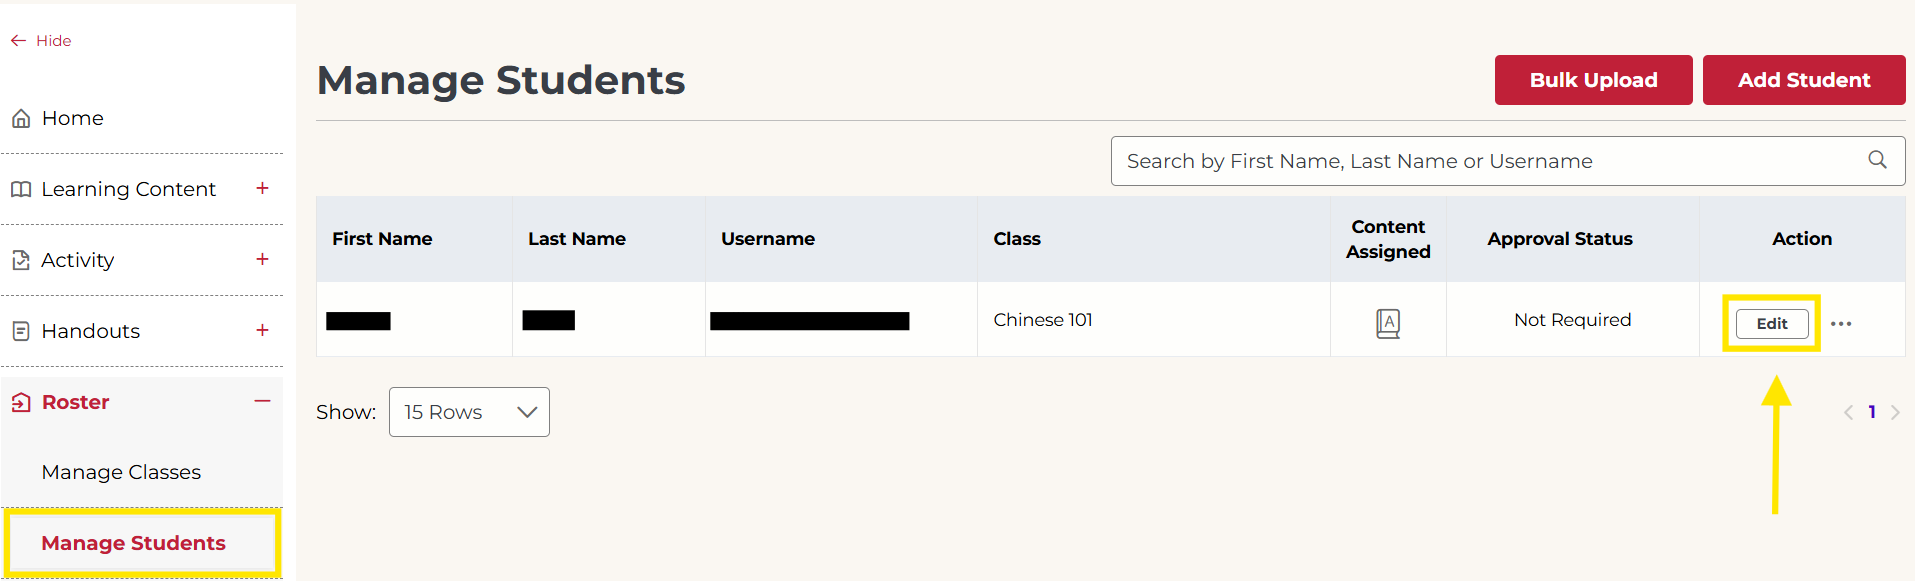
Not what you see? Click to see the old UI view.
Go to Roster -> Student and find the student in the table. Click the Edit icon.

2. In the Class selection box, click the X to remove the listed class.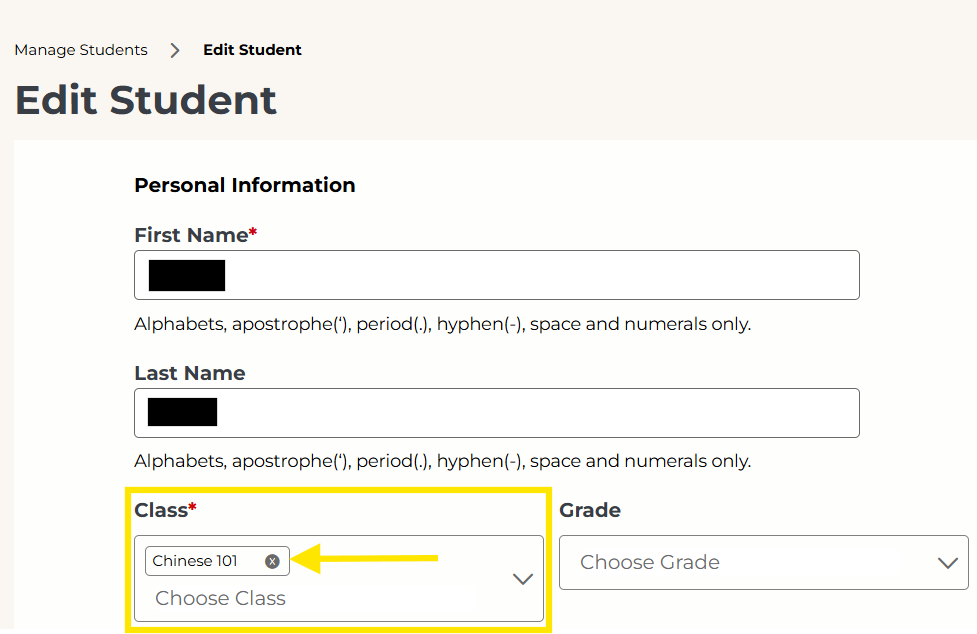
Not what you see? Click to see the old UI view.
In the Assign Classes selection box, deselect the class by selecting “Select.”

3. Scroll down and click the Submit / Save button.
4. If the student is moving to one of your own classes, provide the student with that enrollment token.
Was this article helpful?
That’s Great!
Thank you for your feedback
Sorry! We couldn't be helpful
Thank you for your feedback
Feedback sent
We appreciate your effort and will try to fix the article