Add Student
TABLE OF CONTENTS
Publishers, school/district admins, and teachers can add students in the classes. These students can perform various activities, like reading the content, making notes, adding bookmarks and highlighting within the content, completing assignments, etc.
It is mandatory for the school/district admin or individual teachers to have a sufficient number of licenses to roster students/teachers.
Add Student
1. Log in to the portal
2. Click Roster on the left-hand side menu. Then click Manage Students / Students.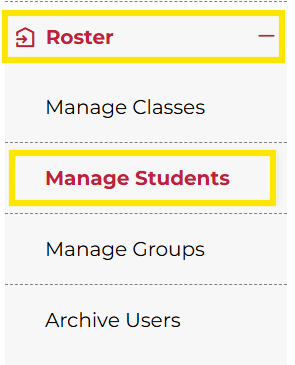
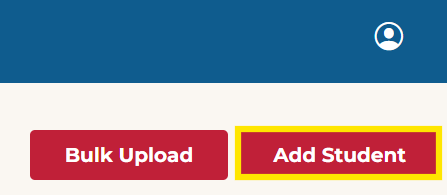
3. To add one student at a time, click Add Student.
Not what you see? Click to see the old UI view.

4. Fill in the following information (All the * marked fields are mandatory, other fields are optional and can be left as is)
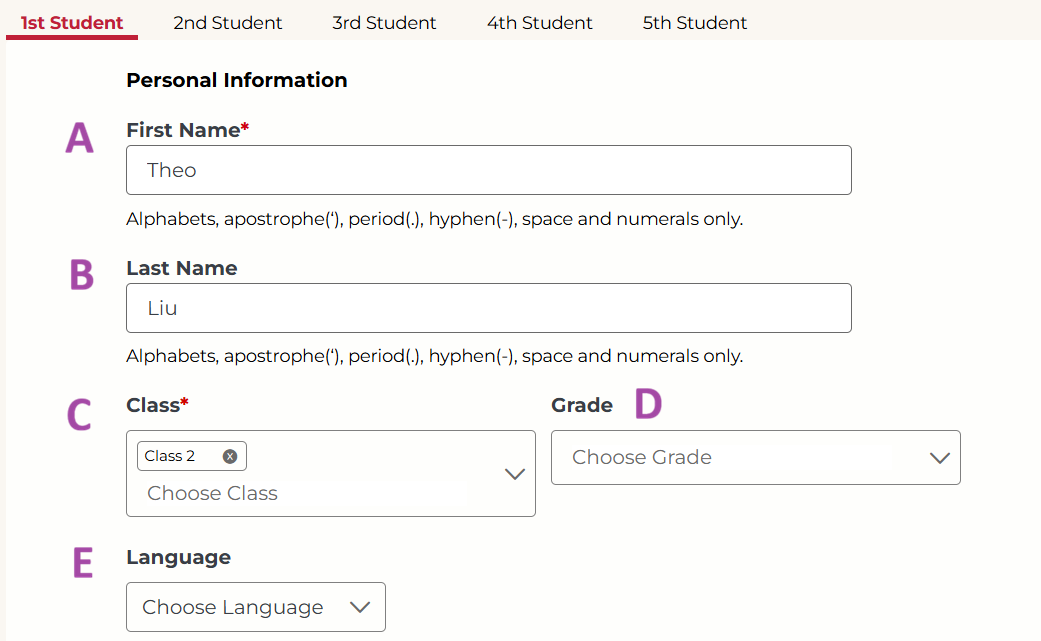
(Note: All the fields marked with * are mandatory. The remaining fields are optional.)
A. First Name: Enter the first name of the student. This field is mandatory.
B. Last Name: Enter the last name of the student. This field is optional.
C. Class: Select the classes or classes for this student. You must create the classes first before adding students. This field is mandatory.
D. Grade: Select the student's grade level. This field is optional.
E. Language: Select the student's user interface language. This field is optional.
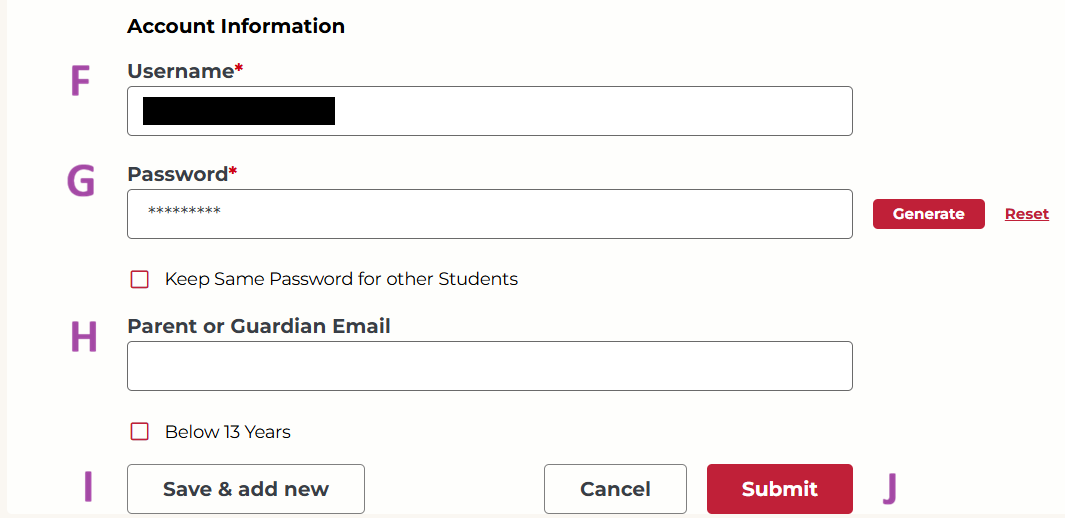
F. Username: Enter the username. Every user must have a unique username, so if you type a username that is already in use, the system will reject it. The username can be an email address, although it doesn't need to be.
G. Password: Enter the password. You can either type in the password or select Generate to auto-generate a password. Select the box Keep the Same Password for other Students if you wish to provide the same password to all the other students. Passwords should be between 6-20 characters.
(Note: Students will not automatically receive their username and password. You must keep track of login information to distribute later. It may be helpful to standardize the information, such as using student emails for usernames and student IDs for passwords.)
H. Parent or Guardian Email: Enter the parent's or guardian's email address. By doing so, a parent account will be created and an email will be sent to the parent, asking them to allow or deny permission for their child to access the portal. A student cannot log in to the portal if the parent has denied permission, in compliance with COPPA and GDPR.
(Note: This field is optional. But, if you check the checkbox for Below 13 years, this field will become mandatory.)
I. Save & Add New: Click Save & add new if you wish to add multiple students at the same time. You can add a maximum of 5 students at once.
J. Submit: Click here when you are done adding students.
Not what you see? Click to see the old UI view.
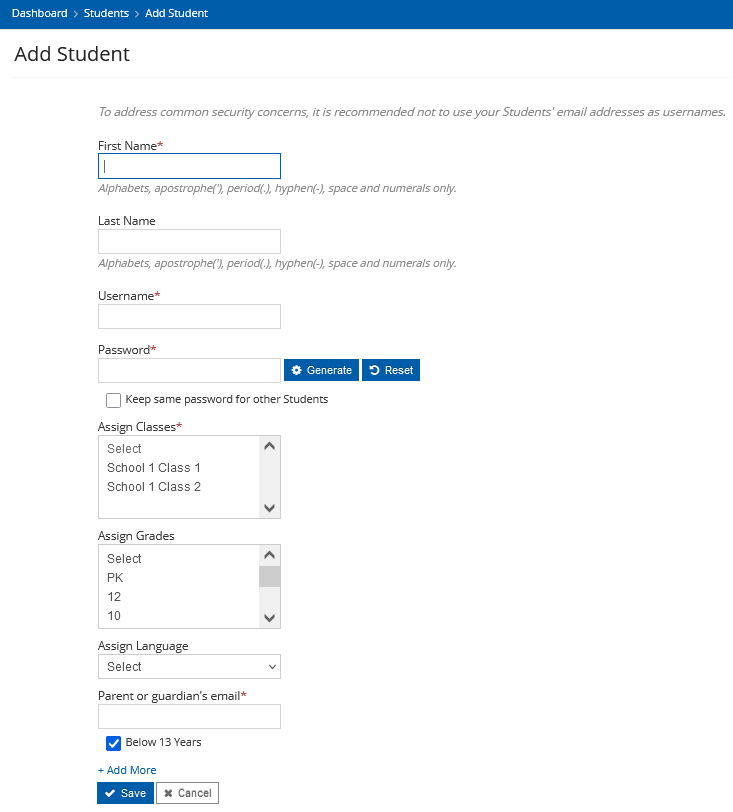
(Note: All the * marked fields are mandatory. The rest of the fields are optional.)
Enter the first name and last name of the student.
Enter the Username. The Username should be unique. It can be an email address, although it doesn't need to be. You can create arbitrary usernames to protect student privacy.
(Note: Students do not automatically receive their account information when rostered. For schools/districts that will not use email addresses for students, it may be helpful to standardize the Username format (such as using the student’s ID number or “firstname-lastname”) so that students can identify their Username independently.)
Enter the password. You can either type in the password or select "Generate" to auto-generate a password. Select the box "Keep the same password for other students" if you wish to provide the same password to all the other students. Passwords should be between 6-20 characters.
(Note: Students do not automatically receive their account information when rostered. Should you choose to generate individual passwords for each student, please record them in a secure location so that you may dispense them to the appropriate students later.)
Click inside the "Assign Classes" box and select the class you want to assign to the student. You can also select and assign multiple classes by holding the CTRL button and clicking on each class. These class names will already exist on the portal. If the class does not exist in the class list, you will need to add the class first, before adding the student.
Click inside the "Grade Name" box and select the grade you want to assign to the student. You can also select and assign multiple grades by holding the CTRL button and clicking on each grade (Optional field).
Click the "Assign Language" drop-down to select the language. The language here refers to the assessment language. The student will be able to access assessments in a particular language, as selected from the drop-down list (Optional field).
Enter the Parent's or guardian's email address. By doing so, the Parent account will be created and an email will be sent to the Parent, to allow or deny permission for their child to access the portal. A student cannot log in to the portal if the parent has denied permission. This field exists on the portal to comply with COPPA and GDPR (Optional field).
(Note: "Parent's or guardian's email" is an optional field. But, if you check the checkbox for "Below 13 years," this field will become mandatory.)
5. (Optional) Click the "Add More" link if you wish to add more students from the same screen. You can add a maximum of 5 students through "Add More."
6. Click "Save."
All the students added will be listed on the "Manage Students" page.
Bulk Upload Student
Publishers, school/district admins, teachers, and Individual teachers can upload a maximum of 1,000 students at one time on the platform using the Bulk Upload Student option.
1. Log in to the portal.
2. Click Roster on the left-hand side menu. Then click Manage Students / Students.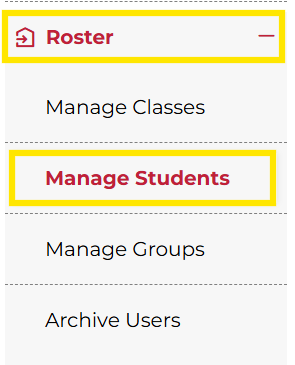
3. Click Bulk Upload / Bulk Action.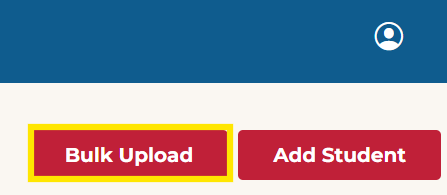
Not what you see? Click to see the old UI view.

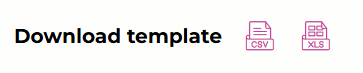
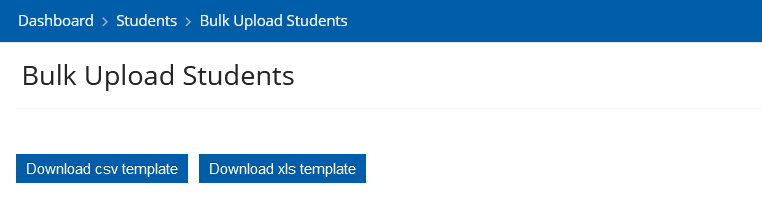
4. Click the CSV or XLS icons to download the template.
Not what you see? Click to see the old UI view.
Click the "Download CSV template" or "Download xls template" button to download the template.
5. Locate the template in your default download folder. Open the file and follow the instructions as mentioned on the portal to enter valid data into the csv/xls template for successful file upload.
See the below screenshot for the data required to Bulk Upload students. Please do not change the structure or remove the column headings in the template.

Helpful hints:
Usernames should be unique. They can be an email address, although it doesn't have to be.
(Note: Students do not automatically receive their account information when rostered. For schools/districts that will not use email addresses for students, it may be helpful to standardize the Username format (such as using the student’s ID number or “firstname-lastname”) so that students can identify their Username independently.)
- Passwords should be between 6 and 20 characters.
(Note: Students do not automatically receive their account information when rostered. Should you choose to generate individual passwords for each student, please record them in a secure location so that you may dispense them to the appropriate students later.)
Class names must be entered exactly as they are spelled on the portal.
Last Name, Grade, and User Language are optional fields. You can leave these columns blank. Do not remove the column headings.
- Enter the Parent Approval Required field as "Yes" or "No". If set to “Yes”, Parent or guardian's email is mandatory
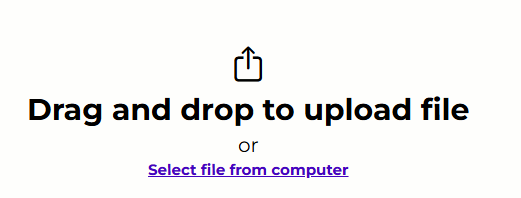
6. Drag and drop to upload file or click Select file from computer.
Not what you see? Click to see the old UI view.
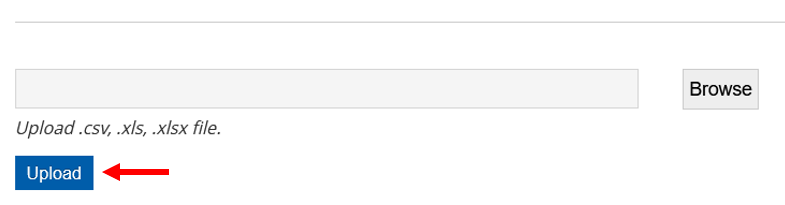
Click on "Browse" to Import the file on the portal from your system.

7. Click Continue / Upload. After uploading, you will receive an auto-generated status email that will also include a description of any errors.
Not what you see? Click to see the old UI view.
(Note: A student who is rostered on the portal through a third-party integration, like OneRoster, Google Classroom, etc, cannot be updated from the platform UI. These students can only be updated by the third-party integration mechanism.)
Was this article helpful?
That’s Great!
Thank you for your feedback
Sorry! We couldn't be helpful
Thank you for your feedback
Feedback sent
We appreciate your effort and will try to fix the article