Advanced Question Options
TABLE OF CONTENTS
Creating Questions
Teachers can create different types of questions in FluencyLink. These questions are added to your Question Bank page and can be used to create Assignable Activities.
Shared Question Features
This section describes features that are shared amongst all or multiple questions. For details on particular question types, see Question Types.
Text Editor
The platform provides a Text Editor to format and input text for questions and choices. The Text Editor contains numerous formatting options and allows you to insert images, audio clips, special characters, links, tables, etc., into questions.

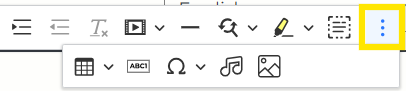
Click the 3 dots on the right to see additional options that may not fit on your screen.
Click to see Text Editor details.
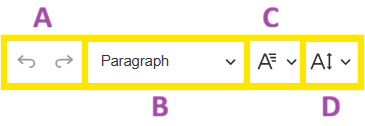
A. Undo and Redo: The undo function is used to reverse a mistake, such as deleting the wrong word in a sentence. The redo function restores any actions that were previously undone using the undo function.
B. Heading: Use Paragraph for normal body text or insert Headings 1-6 to add more structure to your question text.
C. Font Family: Use the Default font or choose from a list of other font options.
D. Font Size: Adjust your font size from 8-72.
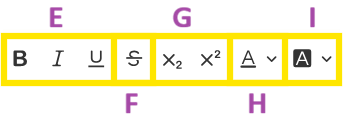 E. Text Formatting
- Bold: Allows you to bold the text of your question.
- Italic: Allows you to italicize the text of your question.
- Underline: Allows you to underline the text of your question.
F. Strikethrough: You can strike through the question text to make it appear crossed out.
G. Subscript and Superscript: You can add a subscript or a superscript in the question text. A subscript or superscript is a character (such as a number or letter) that is set slightly below or above the normal line of type, respectively. It is usually smaller than the rest of the text.
H. Font Color: Use a preset color or use the Color picker to select a custom color.
I. Font Background Color: Gives your text a background color. Use a preset color or use the Color picker to select a custom color.
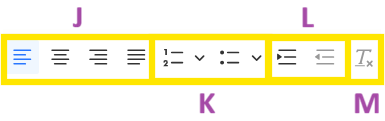 J. Text Alignment
- Align Left: Left alignment joins the text with the left margin.
- Align Center: Center alignment positions the text at the center of the page, at equal distance from the left and right margins.
- Align Right: Right alignment joins the text with the right margin.
- Justify: This alignment joins the text with both the left and right margins, and stretches the text if needed.
K. Lists
- Numbered List: Insert an ordered list with numbers, letters, or Roman numerals.
- Bulleted List: Insert an unordered list. You can choose between 3 different styles of bullet points.
L. Text Indentation
- Increase Indent: Use this to indent your text, moving it further to the right.
- Decrease Indent: Use this to de-indent your text, moving it further to the left.
M. Remove Format: Use this to remove custom formatting from your text, thus restoring default options.
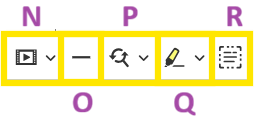
N. Insert Media: Paste a video URL to insert it into your question.
O. Horizontal Line: Add a horizontal divider line to your question text.
P. Find and Replace: Helps you to find specific words in the question text and lets you replace all instances of the word or format the word.
Q. Highlight: Highlight your text using 1 of 6 available styles.
R. Select All: Selects all the text in a question.
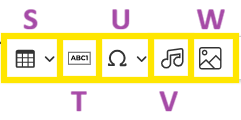
S. Insert Table: You can insert a table in the question text. Click a table to select table properties. Add rows, columns, captions, summary and adjust the alignment using the table properties.
T. Insert Fill in the Blank Input: Click on this button to insert the blank box in the question. This is enabled only for the below question types:
- Fill in the Blanks
- Fill in Blanks with Dropdown
- Fill in the Blanks with Drag and Drop
U. Special Characters: Insert special characters such as mathematical symbols and accent marks into the question text.
V. Upload Audio: Insert audio in the question text by uploading an audio clip from your computer.
W. Insert Custom Image: Insert an image in the question text by uploading the image from your computer.
Not what you see? Click to see the old UI view.

The text editor contains the following features (left to right, top to bottom):


Note:
You cannot insert a table in the question-answer option for all question types.
You cannot insert images, audio or tables in the rows and columns matrix for Match the Following questions.
The “Insert Fill in the Blank Input” option in the Text Editor is only enabled for the following question types:
Fill in the Blanks
Fill in Blanks with Dropdown
Fill in the Blanks with Drag and Drop
Saving Questions
Any changes to a question must be saved for the changes to take effect.

- Save: Save the question
- Save & Add New: Save the current question and add a new question
Not what you see? Click to see the old UI view.


Set the Question Score
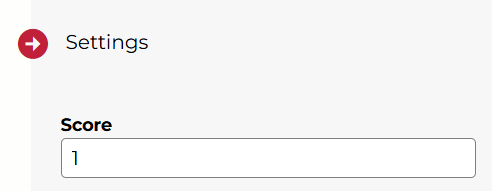
The platform provides a default score of 1 for each question. You can change the score from the Settings.
1. In the Settings menu on the right-hand side, adjust the value in the Score box.
Not what you see? Click to see the old UI view.
1. Click on the “Setting” icon.
2. Enter the score in the space provided.

Shuffle Choices
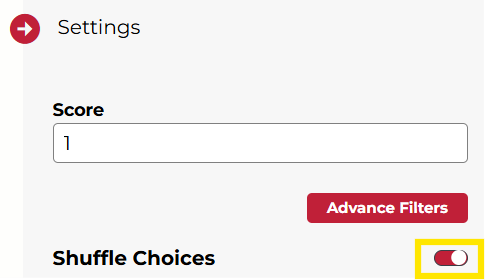
Use this setting to randomly shuffle the order of choices presented to students.
1. In the Settings menu on the right-hand side, toggle on Shuffle Choices.
Not what you see? Click to see the old UI view.
1. Click on the “Setting” icon.
2. Click "More Settings"
3. Toggle ON the “Shuffle Choices” option.
Add Question Level Feedback
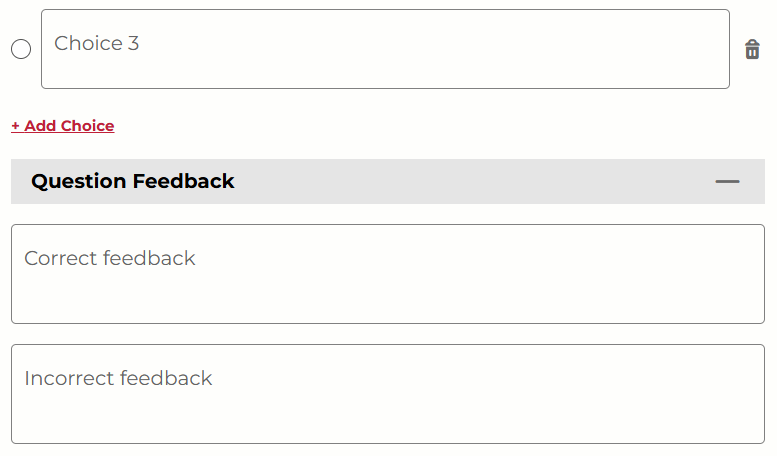
While creating a question, you can provide feedback for correct and incorrect answers. Students will see the correct answer feedback if they have given the correct answer for the question. Students will see the incorrect answer feedback if they have given the incorrect answer for the question.
1. In the Settings menu on the right-hand side, toggle on Question Feedback.
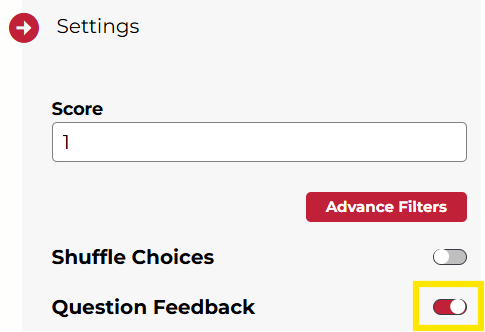
2. Below the answer choices, you will see a Question Feedback section. Enter your feedback in the spaces provided.
Not what you see? Click to see the old UI view.
1. Click on the “Setting” icon.
2. Toggle ON the “Feedback” option to enable question level feedback.
3. Enter the “Correct Answer Feedback” and/or the “Incorrect Answer Feedback” in the space provided.

Add Choice Level Feedback
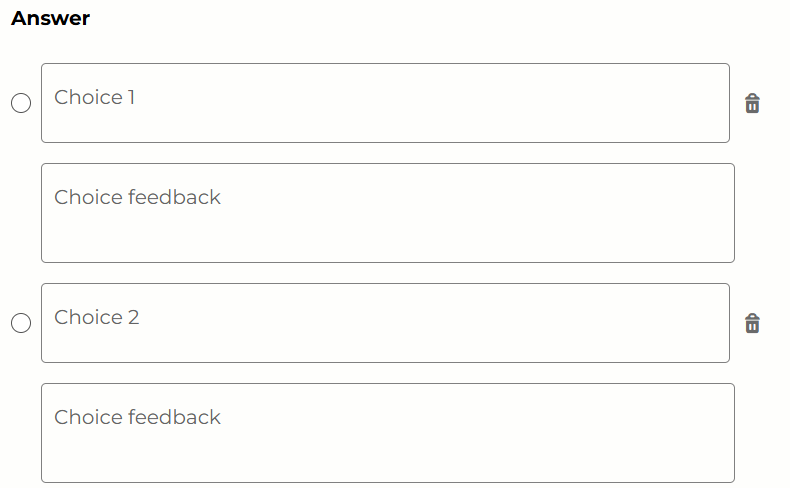
While creating a question, you can provide feedback on each possible answer choice. This feedback will be visible to the student at the time of the question evaluation.
(Note: Does not apply to Association, Descriptive, or Audio Recording type questions.)
1. In the Settings menu on the right-hand side, toggle on Feedback on Choices.
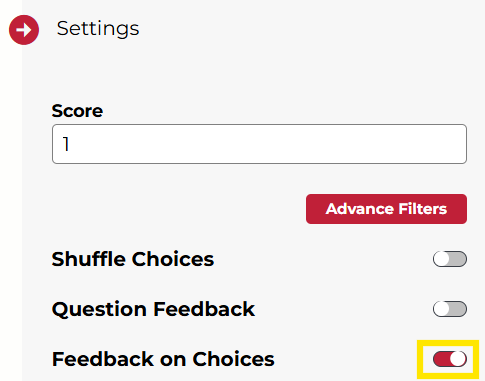
2. Below each answer choice, you will see a Choice feedback box. Enter your feedback in the spaces provided.
Not what you see? Click to see the old UI view.
1. Click on the “Setting” icon.
2. Toggle ON the “Feedback on Choices” option to enable Choice level feedback.
3. Enter the “Answer Feedback” in the space provided.

Add Hint
Students will have the option to view hints while answering the question. If desired, you can impose a penalty for viewing hints.
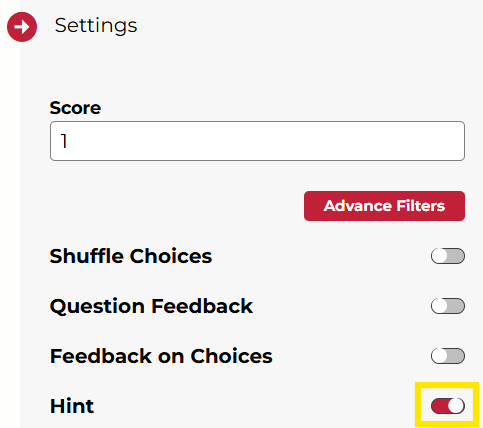
1. In the Settings menu on the right-hand side, toggle on Hint.
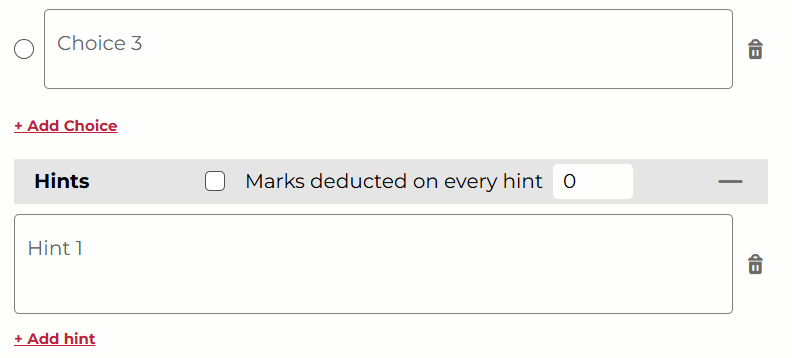
2. Below the answer choices, you will see a Hints section. Enter your hint in the spaces provided.
- Use the Marks deducted on every hint checkbox if you wish to deduct points when students view the hint. Enter the number of points to deduct in the small box provided.
- Click Add hint to add up to 5 hints for the question.
Not what you see? Click to see the old UI view.
1. Click on the “Add Hint” button to add a hint to the question.

2. Click on “New” in the “Hints” box to add a new hint. You can add a maximum of 5 hints for each question.
3. Check the “Deduct Marks on Every Hint” checkbox and enter the number of marks to be deducted in the space provided. This will allow marks deduction, if a student takes the help of hints to answer the question.
Add Teacher Hint
Teacher hints are visible to the teacher when they are evaluating the student submissions. They are not visible to students.
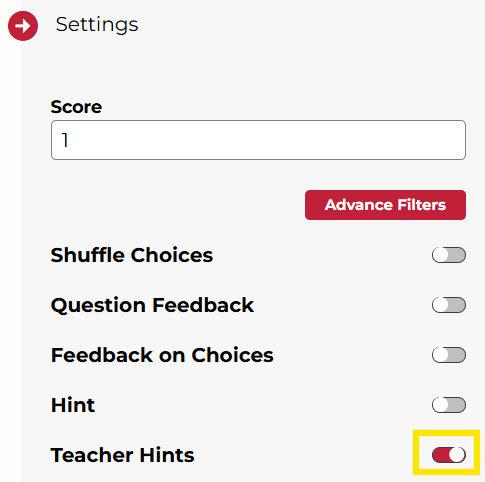
1. In the Settings menu on the right-hand side, toggle on Teacher Hints.
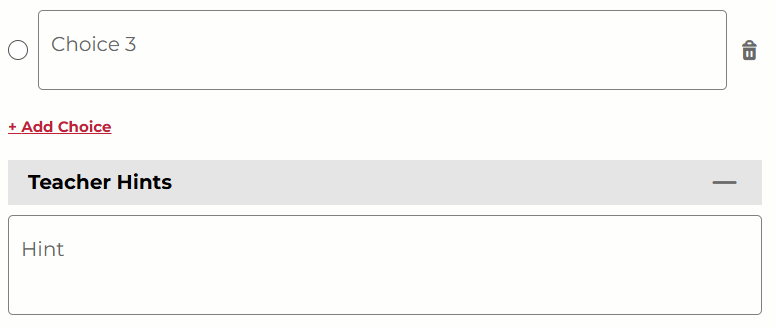
2. Below the answer choices, you will see a Teacher Hints section. Enter your hint in the spaces provided.
Not what you see? Click to see the old UI view.
Below the question, click on the “Add Teacher Hint” button to add a hint to the question.

Was this article helpful?
That’s Great!
Thank you for your feedback
Sorry! We couldn't be helpful
Thank you for your feedback
Feedback sent
We appreciate your effort and will try to fix the article